Working with images
The pystacia.image.Image is a central concept to the whole library. Though you typically don’t use its constructor directly and rely on factories. All the functionality is implemented in pystacia.image module but for convenience reasons attributes are imported to main pystacia module from where you would import it.
Reading and writing
Files, streams and byte strings
To read a file from the disk you would use pystacia.image.read() factory:
from pystacia import read

image = read('example.jpg')
This reads file example.jpg from current working directory and returns pystacia.image.Image instance. To write it back to disk under different name and format you could write:
image.write('output.png')
This would save it back to output.png file with format PNG. Format is determined from the file extension.
Sometimes instead of having your data stored in a file you already have it in byte string or stream (file-like object with read() method). In such case you use pystacia.image.read_blob() instead:
from pystacia import read_blob

# data is byte string or stream in e.g. PNG format
image = read_blob(data)
Pystacia can also deal with RAW uncompressed data. You use pystacia.image.read_raw() method in such cases. Note that you need to explicitly specify RAW format, width, height and depth per channel as it’s not carried along data itself.
from pystacia import read_raw

# create 2x2 pixel RGB image with red, green, blue and black pixel
# from RGB triplets in 8 bit depth
data = [255, 0, 0, 0, 255, 0, 0, 0, 255, 0, 0, 0]
data = bytes(data) # python 3k, ''.join(chr(x) for x in data) in 2.x

image = read_raw(data, 'rgb', 2, 2, 8)
Sometimes you may also want to dump image object contents to byte string instead of saving in to this. You use get_blob method to do so. To dump image contents as PNG blob you would call:
image.get_blob('png')
To get RAW data along its format, dimensions, and depth as dictionary analogical to parameters you would pass to pystacia.image.read_raw() you can call pystacia.image.get_raw() passing it color space:
image.get_raw('ycbcr')
Generic images
Instead of reading an image from a file or stream you sometimes may want to start from blank image or well defined pattern.
Use pystacia.image.blank() to create empty blank image of given dimensions. By default it fills it with transparent pixels, but a third parameter specifying color can be used.
>>> from pystacia import blank, color
>>> blank(100, 100)
>>> blank(100, 100, color.from_string('red'))
>>> blank(100, 100, color.from_rgba(0, 1, 0, 0.5))
Transparent (default)

Red
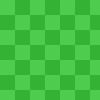
Translucent green
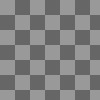
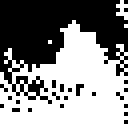
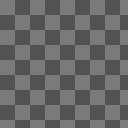
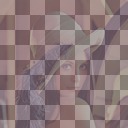
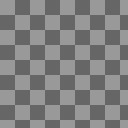
You can also generate a checkerboard pattern which is used in this documentation to mark transparent pixels with pystacia.image.checkerboard() which accepts width and height.
>>> from pystacia import checkerboard
>>> checkerboard(200, 200)
Checkerboard pattern
Common properties
Dimensions
All images have some common properties like dimensions, color space, type and depth. To get dimensions of the image you can access pystacia.Image.size property to get (width, height) tuple or pystacia.Image.width and pystacia.Image.height separately:
>>> image.size
(640, 480)
>>> image.width
640
>>> image.height
480
Color space
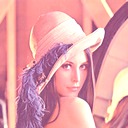
Color space represents combination of channels that image is internally stored in. You can query it with pystacia.Image.colorspace property. It yields pystacia.image.colorspaces.rgb for most images but other values are also possible.
>>> image.colorspace
pystacia.lazyenum.enum('colorspace').rgb
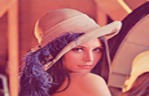
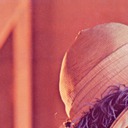
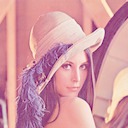
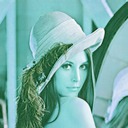
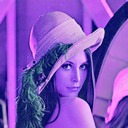
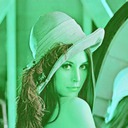
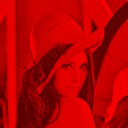
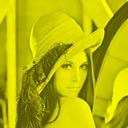
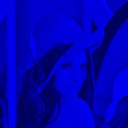
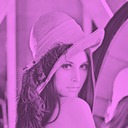
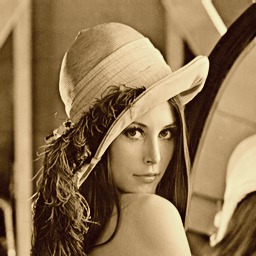
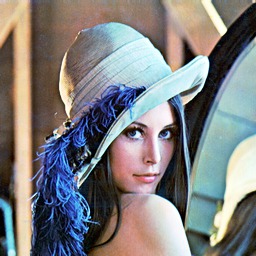
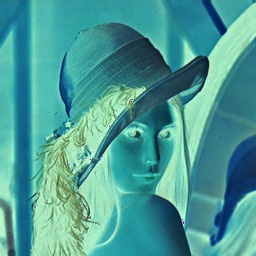
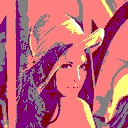
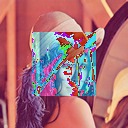
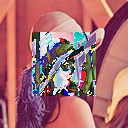
You can also assign to this property. It results in reinterpretation of stored color space i.e. if the original image was in RGB color space assigning it YCbCr would result in treating Red channel as Luma and Green and Blue information as Chroma components which yields strange visual effects.

Original RGB image
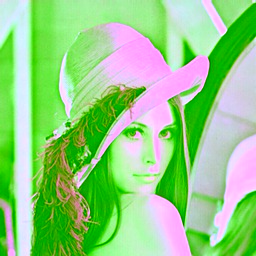
Reinterpreted as YCbCr

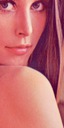
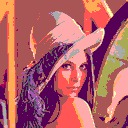
Reinterpreted as CMY
Note that RGB image reinterpreted as CMY is simply negative since CMY is subtractive model complementing RGB i.e. each channel value is inversion of its counterpart.
If you want to change (convert) underlying color space without affecting visual representation use pystacia.image.Image.convert_colorspace() method instead.
Depth
Depth represents number of bits used to store channel information. It’s typically 8 bit for TrueColor images but can be as well 16 bit for some TIFF images. You query the image depth with pystacia.image.Image.depth property.
>>> image.depth
8
Storage type
Another aspect of image storing is a type. Type of image relates to how the values stored in memory are mapped into color values on the screen. Sometimes it’s a direct mapping like TrueColor where values stored in :term: RGB triplets directly encode their visual representation. Another popular type are paletted (indexed) images where image consist of abstract values (typically 0 to 255) that are translated into final color value through a lookup table (palette). This has been popularized with GIF format. Grayscale image is an image storing only luminosity information (also typically in one byte). It can be also taught as a indexed image with implied palette which maps each luminosity (l) value into an RGB triplet (l, l, l). Finally bilevel image is an image consisting of two colors - typically black and white stored in one bit per pixel.
Each of types mentioned above also has its matte counterpart i.e. one that is accompanied by alpha channel. These have additional _matte suffix.
You can read and set types with pystacia.Image.type property. Setting a type which loses color information relative to original results in automatic dithering:
>>> image.type
pystacia.lazyenum.enum('type').truecolor
>>> image.type = types.palette
>>> image.type = types.grayscale
>>> image.type = types.bilevel
Here are close-ups of resulting images:

TrueColor image

Converted to pallette

Coverted to grayscale
Coverted to bilevel
Geometry transformation
Rescaling
Rescaling is an operation of changing size of original image that preserves all the original visual characteristics in the new viewport. Rescaling can be both proportional and not proportional. You typically perform this operation by suppling width and height into pystacia.image.Image.rescale():
>>> image.size
(256, 256)
>>> image.rescale(300, 200)
>>> image.size
(300, 200)
>>> image.rescale(128, 128)
>>> image.size
(128, 128)
Original

(100, 200)

(128, 128)
Alternatively you can pass factor into method. This specifies how many times the original sizes are multiplied. If you pass single number the scaling will be proportional in both dimensions. You can also pass a two-element tuple.
>>> image.rescale(factor=0.75)
>>> image.rescale(factor=(0.6, 0.5))
>>> image.rescale(factor=(1.3, 1))

Factor 0.75

Factor (0.6, 0.5)
Factor (1.3, 1)
Note that this way resulting size is calculated relatively to previous size.
Another interesting aspect of resizing is resize filter. This affects the sharpness or smoothness and quality of rescaled image. Typically used filters include point (also known as nearest neighbor), cubic, sinc or lanczos.
>>> image.rescale(factor=2, filter=filters.point)
>>> image.rescale(factor=2, filter=filters.cubic)
>>> image.rescale(factor=2, filter=filters.sinc)
>>> image.rescale(factor=2, filter=filters.lanczos)
Upscaling close-ups with differnt filters:

Point

Cubic

Sinc

Lanczos
>>> image.rescale(factor=0.5, filter=filters.point)
>>> image.rescale(factor=0.5, filter=filters.cubic)
>>> image.rescale(factor=0.5, filter=filters.sinc)
>>> image.rescale(factor=0.5, filter=filters.lanczos)
Downscaling close-ups with different filters:

Point

Cubic

Sinc

Lanczos
Resizing
If you wanna crop out a portion of an image you can use pystacia.image.Image.resize(). it accepts four parameters describing cropped out region: width, height, x and y in this order. The latter two default to 0:
>>> image.size
(256, 256)
>>> image.resize(128, 128)
>>> image.resize(64, 128, 128, 128)
Original
(128, 128)
(64, 128, 128, 128)
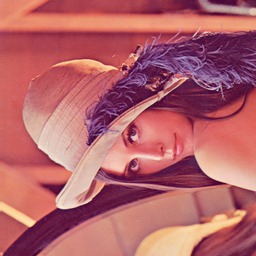
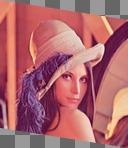
Rotating
You can rotate an image with pystacia.image.Image.rotate() method. Angle is mesaured in degrees. Positive angles yield clockwise rotation while negative ones counter-clockwise. The resulting empty spaces are filled with transparent pixels.
>>> image.rotate(30)
>>> image.rotate(90)
>>> image.rotate(-45)

Original
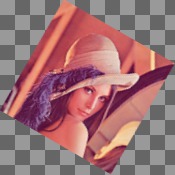
30°
90°
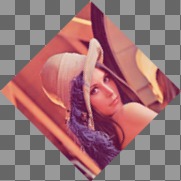
-45°
Flipping
Use pystacia.image.Image.flip() to flip (mirror) image around X or Y axis. Use pystacia.image.Image.axes enumeration to specify axis.
>>> image.flip(axes.x)
>>> image.flip(axes.y)
Original
Mirror X
Mirror Y
Transposing and transversing
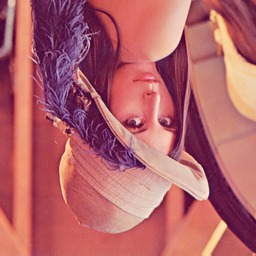
Use pystacia.image.Image.transpose() and pystacia.image.Image.transverse() to transpose or transverse an image. Transposing creates a vertical mirror image by reflecting the pixels around the central x-axis while rotating them 90-degrees. Transversing creates a horizontal mirror image by reflecting the pixels around the central y-axis while rotating them 270-degrees.
Original
Transposed
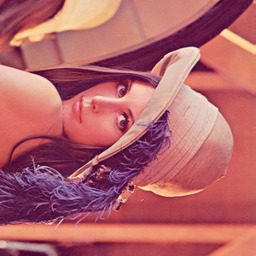
Transversed
Skewing
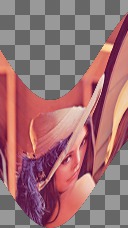
Skewing is the action of pushing one of the edges of an image along X or Y axis. You can perform it with pystacia.image.Image.skew() passing offset in pixels and desired axis.
>>> image.skew(10, axes.x)
>>> image.skew(-5, axes.x)
>>> image.skew(20, axes.y)
Original
10 pixels along X

-5 pixels along X
20 pixels along Y
Rolling
Rolling in an action of offsetting an image and filling empty space with pixels that overflew on the edge. It can be performed with pystacia.image.Image.roll() method. It accepts offses in X and Y directions as arguments.
>>> image.roll(100, 0)
>>> image.roll(-30, 40)
Original
Rolled by (100, 0)
Rolled by (-30, 40)
Straightening image
Sometimes you have an image that is not straightened since It could be scanned so. You can use pystacia.image.Image.straighten() to correct that. It accepts single parameter - threshold which tells Pystacia what is the difference between baackground and subject.
>>> image.straighten(20)

Rotated image

Straightened up
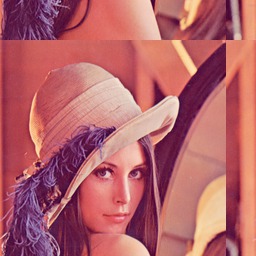
Trimming extra background
If your image has extra background around it you can trim it off with pystacia.image.Image.trim() method. It accepts two optional parameters similarity and background color of space to discard (defaults to transparent).
>>> image.trim()
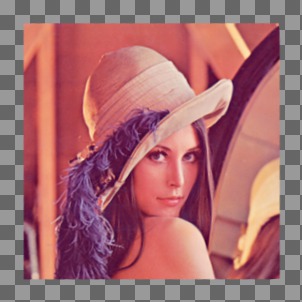
Image with empty space
Trimmed off
Color transformation
Color transformations are operations that affect color channel information without changing pixel location in any way.
Adjsuting contrast
pystacia.image.Image.contrast() increases or decreases contrast of an image. Passing 0 is no change operation. Values towards -1 decrease constract whilst values towards 1 increase it.
>>> image.contrast(-1)
>>> image.contrast(-0.6)
>>> image.contrast(-0.25)
>>> image.contrast(0)
>>> image.contrast(0.25)
>>> image.contrast(0.75)
>>> image.contrast(1)

-1
-0.6
-0.25
0 (original)
+0.25
+1
Adjusting brightness
pystacia.image.Image.brightness() adjusts the brightness of an image. Value 0 is no-change operation. Values towards -1 make image darker whilst calues towards 1 increase brightness.
>>> image.brightness(-1)
>>> image.brightness(-0.6)
>>> image.brightness(-0.25)
>>> image.brightness(0)
>>> image.brightness(0.25)
>>> image.brightness(0.75)
>>> image.brightness(1)

-1
-0.6
-0.25
0 (original)
+0.25
+0.75
Gamma correction
You can use pystacia.image.Image.gamma() to apply gamma correction. Value of 1 is no-change operation. Values towards 0 make image darker. Values towards infinity make image lighter.
>>> image.gamma(0.3)
>>> image.gamma(0.6)
>>> image.gamma(1)
>>> image.gamma(1.5)
>>> image.gamma(2)

0.1
0.3
0.6
1 (Original)
1.5
2
Modulation
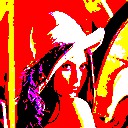
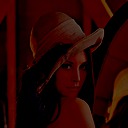
Modulation is an operation of adjusting hue, saturation and luminance of an image. It can be accomplished with pystacia.image.Image.modulate(). It accepts parameters in hue, saturation and luminance order. They all default to 0 meaning no change. Usable hue values start from -1 meaning rotation of hue by -180 degrees to 1 meaning +180 degrees. Saturation values towards -1 desaturte image whilst values towards infinity saturate it. Setting luminosity to -1 yields completely black image whilst values towards infinity make it brighter.
>>> image.modulate(-1, -0.25, 0.1)
>>> image.modulate(-0.5, 0.25, 0)
>>> image.modulate(-0.2, 0.5, -0.25)
>>> image.modulate(0, 0, 0)
>>> image.modulate(0.4, -0.5, 0)
>>> image.modulate(0.8, 0, 0)
(-1, -0.25, 0.1)
(-0.5, 0.25, 0)
(-0.2, 0.5, -0.25)
(0, 0, 0) Original

(0.4, -0.5, 0)
(0.8, 0, 0)
Desaturation
You can peform desaturation with pystacia.image.Image.desaturate(). It is a shortcut to pystacia.image.Image.modulate() passing -1 as saturation.
>>> image.desaturate()
Original

Desatured
Colorization
Colorization in an action of replacing all hue values in an image with a hue from a given color. pystacia.image.Image.colorize() accepting single color parameter performs it.
>>> image.colorize(color.from_string('red'))
>>> image.colorize(color.from_string('yellow'))
>>> image.colorize(color.from_string('blue'))
>>> image.colorize(color.from_string('violet'))
>>> image.colorize(color.from_string('green'))
Original
red
yellow
blue
violet
Sepia tone
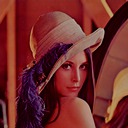
pystacia.image.Image.sepia() performs effect similar to old-fashined sepia image. You can adjust hue and saturation parameters but the default values are a good starting point.
>>> image.sepia()
Original
Sepia tonning
Equalization
pystacia.image.Image.equalize() is a method of streching channel information to fill full avaiable spectrum. It can result in drastic color quality improvement on low contrast, tainted images.
>>> image.equalize()
Original
Equalized image
Invertion
Invertion is a process of substractin original channel value from it’s maximum value. It results in a negative and can be performed with pystacia.image.Image.invert().
>>> image.negative()
Original

Inverted image
Solarization
Solarization leads to effect similar of partly exposing an image in a darkroom. It can be performed with pystacia.image.Image.solarize(). It accepts single parameter - factor. Factor 0 is no change operation, Factor 1 is exactly the same as negative of original. Value of 0.5 yields particulary interesting effects.
>>> image.solarize(0)
>>> image.solarize(0.5)
>>> image.solarize(1)
0 (Original)
0.5
1 (Inverted original)
Posterization
pystacia.image.Image.posterize() accepts single level parameter and reduces number of colors in the image to levels ** 3 colors. Each channel has level final values distributed equally along its spectrum. So 1 level yields 1 color, 2 levels yield 8 color and so on.
>>> image.posterize(2)
>>> image.posterize(3)
>>> image.posterize(4)
>>> image.posterize(5)
Original

2 levels
3 levels
4 levels
5 levels
Bluring, denoising and enhancing
Blur
You can blur image with pystacia.image.Image.blur(). Method accepts mandatory radius and optional strength parameter.
>>> img.blur(3)
>>> img.blur(10)
Original

radius 3

radius 10
Radial blur
To perform radial blur use pystacia.image.Image.radial_blur(). Pass in single parameter - blur angle in degrees.
>>> img.blur(10)
>>> img.blur(45)
Original
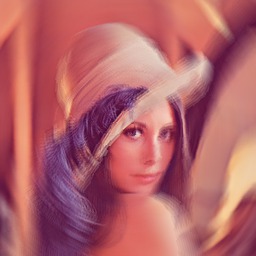
10 degrees
45 degrees
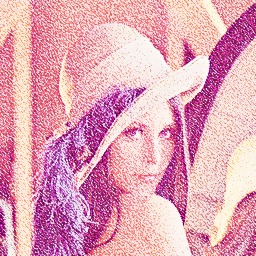
Removing noise
If you want to perform noise removal you can use pystacia.image.Image.denoise() method.
>>> img.denoise()
Original
Denoised image
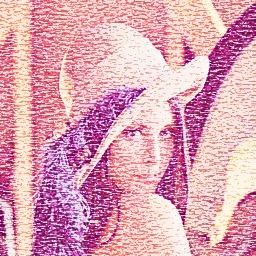
Removing speckles
pystacia.image.Image.despeckle() on the other hand removes speckles - larger grain defects than noise.
>>> img.despeckle()
Original

Despeckled image
Embossing
Emboss raises detected edges in image creating 3D effect sharpening it at the same time. Call pystacia.image.Image.emboss() to use it.
>>> img.emboss()
Original
Embossed image
Deforming
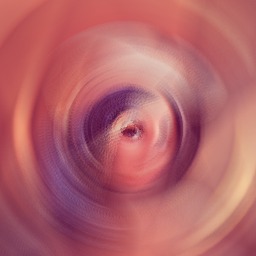
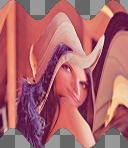
Swirling
To apply whirlpool like effect use pystacia.image.Image.swirl(). Positive angles result in clockwise whirling, negative in counter-clockwise.
>>> img.swirl(60)
>>> img.swirl(-30)
Original
60 degrees
-30 degrees
Waving
pystacia.image.Image.wave() applies sinusoidal deformation along give axis (defaults to x). You can control amplitude and length of the wave. Resulting extra pixels are transparent.
>>> img.wave(20, 100)
>>> img.wave(-10, 50)
>>> img.wave(50, 200 axis=axes.y)
>>> img.wave(10, 30, axis=axes.y)
Original
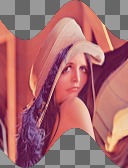
(100, 20, x)
(50, -10, x)
(200, 50, y)
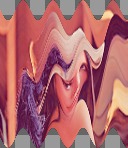
(30, 10, y)
Special effects
Sketch effect
You can use pystacia.image.Image.sketch() to simulate sketch effect. You can control the effect with two parameters radius of strokes and angle of pencils (defaults to 45 degrees).
>>> image.sketch(3)
>>> image.sketch(6, 0)
Original
radius 3, angle 45
radius 6, angle 0
Oil paint effect
pystacia.image.Image.oil_paint() simulates oil painting by covering image with circles filled with mean color value. It accepts single paramater - radius in pixels.
>>> image.oil_paint(3)
>>> image.oil_paint(8)
Original
radius 2

radius 8
Spreading
pystacia.image.Image.spread() fuzzes and image with pixel displacement within given radius.
>>> image.spread(3)
>>> image.spread(6)
Original

radius 2

radius 6
Fx method
With pystacia.image.Image.fx() you can perform custom operations using ImageMagick tiny scripting language. Beware that this can be very slow on large images as it’s directly interpreted and not compiled in any way. http://www.imagemagick.org/script/fx.php has infomration on syntax.
>>> image.fx('u * 1/2')
Original
After processing
Pixel manipulation
Reading single pixels
To access pixel data anywhere in the image you cen use pystacia.image.Image.get_pixel() passing it x and y coordinates.
>>> image.get_pixel(128, 128)
<Color(r=0.9396,g=0.5933,b=0.4317,a=1) object at 0x108002200L>
Filling
If you want to fill image with solid color you use pystacia.image.Image.fill() passing it color. You can optionally pass also blend parameter specyfing opacity with 1 meaning opaque.
>>> image.fill(color.from_string('red'))
>>> image.fill(color.from_string('green'), 0.5)
>>> image.fill(color.from_string('blue'), 0.25)
>>> image.fill(color.from_string('orange'), 0.2)
Original

red
green 0.5 blend
blue 0.25 blend
orange 0.2 blend
Setting color
Another way to paint over whole image is using pystacia.image.Image.set_color(). Unlinke pystacia.image.fill() it always discards backgorund information replacing pixels. You can use alpha component of color to gain translucency.
>>> image.set_color(color.from_string('red'))
>>> image.set_color(color.from_rgba(0, 1, 0, 0.5))
>>> image.set_color(color.from_rgba(0, 0, 0, 0.2))
>>> image.set_color(color.from_rgba(1, 0, 1, 0.5))
Original

red

green 0.5 alpha
black 0.2 alpha
violet 0.5 alpha
Setting alpha
Sometimes you may want to override alpha level for all pixels at once. You can do that with pystacia.image.Image.set_alpha().
>>> image.set_alpha(0.75)
>>> image.set_color(0.5)
>>> image.set_color(0.25)
>>> image.set_color(0)
Original

0.75
0.5
0.25
0
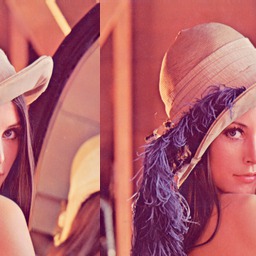
Overlaying
With pystacia.image.Image.overlay() you can overlay images on top of image the method is called from. It accepts the image that is going to be overlaid as first parameter, x and y coordinates and composite mode. There are many composite modes available. over is the default one, other popular ones include colorize, multiply, overlay, pin_light.
>>> image.overlay(other, 32, 32)
>>> image.overlay(other, 32, 32, composites.colorize)
>>> image.overlay(other, 32, 32, composites.multiply)
>>> image.overlay(other, 32, 32, composites.overlay)
>>> image.overlay(other, 32, 32, composites.pin_light)
>>> image.overlay(pther, 32, 32, composites.saturate)
Original
Over (default)
colorize
multiply

overlay
pin_light
saturate
soft_light
modulus_add
modulus_substract
luminize
hard_light
Utilities
Displaying on the screen
When in GUI session you can display image in available image preview program with pystacia.image.Image.show(). The call is non-blocking meaning that the control is immediately returned to your program
>>> image.show()
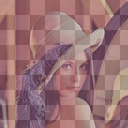
Marking transparent pixels
Sometimes it might be not clear from the context which pixels are translucent and which are opaque. You can use pystacia.image.Image.checkerboard() to overlay your image on top of checkerboard pattern in the same manner that Photoshop does.
>>> image.checkerboard()
Bundled images
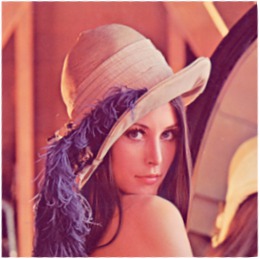
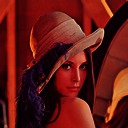
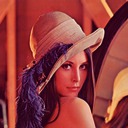
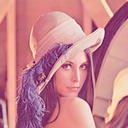
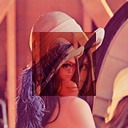
pystacia comes with standard test images which can be used for testing purposes. Most of them are embedded in ImageMagick library.
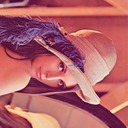
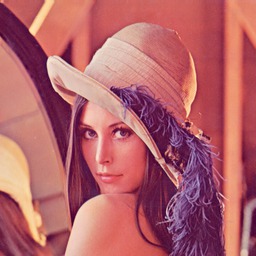
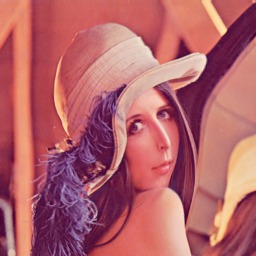
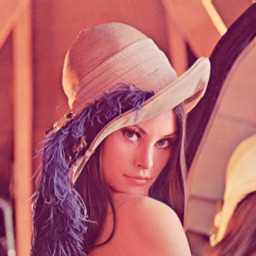
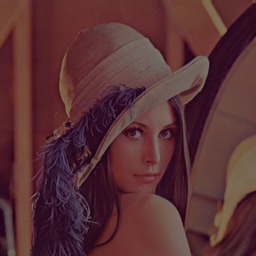
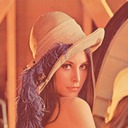
pystacia.lena() optionally accepting size parameter:
pystacia.magick_logo():
pystacia.rose():

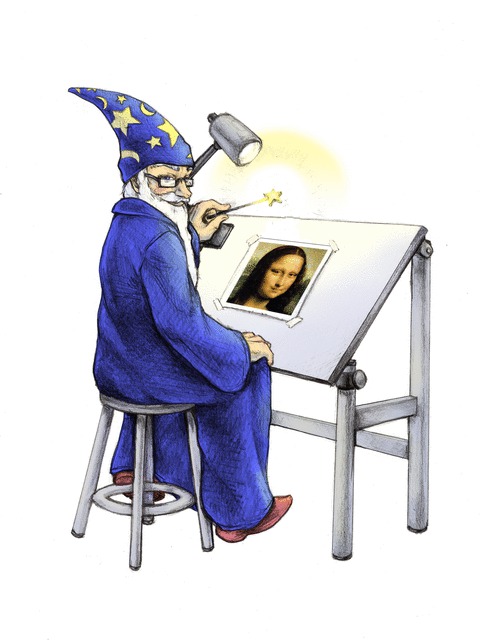
pystacia.wizard()
pystacia.granite()
pystacia.netscape()
![]()
Table Of Contents
- Working with images
Related Topics
- Documentation overview
- Previous: Installation
- Next: Working with color